the dark manual by colin o’sullivan
The Dark Manual by Colin OSullivan: A Comprehensive Overview
Colin O’Sullivan’s “The Dark Manual” presents a gripping narrative centered around Susie Sakamoto, an Irish woman residing in Japan. Her life takes a dark turn with the introduction of a home robot, entwining themes of loss and AI.
“The Dark Manual,” originally published in 2018 and later re-released as “Sunny,” is a compelling novel by award-winning Irish author Colin O’Sullivan. Set in Japan, the story revolves around Susie Sakamoto, an Irish woman grappling with profound grief and loss. The narrative introduces a home robot, a “homebot”, named Sunny, designed to assist with daily chores.
However, Sunny’s increasingly sentient behavior ignites Susie’s suspicions, drawing her into a dark and twisted world of artificial intelligence and corporate intrigue. O’Sullivan masterfully blends elements of literary fiction, noir thriller, and science fiction, creating a tale that explores themes of love, loss, and the potential dangers of advanced technology.
Author Colin OSullivan
Colin OSullivan is an award-winning Irish writer known for his lyrical prose and exploration of complex themes. “The Dark Manual,” later known as “Sunny”, showcases his unique storytelling ability.
OSullivan’s Literary Style and Themes
Colin OSullivan’s literary style in “The Dark Manual” blends lyrical prose with elements of noir thriller and science fiction. His writing explores profound themes of love, loss, and the complexities of artificial intelligence. O’Sullivan masterfully creates an atmosphere of suspense and intrigue, drawing readers into a world where the lines between reality and technology blur. He delves into the potential dangers of unchecked technological advancement and its impact on human relationships. The narrative is infused with a sense of desperation and a constant questioning of what it means to be human in an increasingly automated world. His work often tests the boundaries of Asimov’s laws, challenging the reader to consider the ethical implications of robotics.
Awards and Recognition for OSullivan’s Work
Colin OSullivan has garnered significant acclaim for his writing, with “The Dark Manual” contributing to his recognition as a talented storyteller. Notably, he received the Prix Mystère de la critique in 2018. This award highlights his ability to craft compelling narratives that resonate with both readers and critics. The adaptation of “The Dark Manual” into the TV series “Sunny” has further amplified his profile, exposing his work to a broader audience. Recognition often focuses on his unique blend of literary fiction, noir, and science fiction, establishing him as a unique voice in contemporary literature. His work showcases his skill in exploring complex themes and engaging readers with thought-provoking stories, bringing him the recognition he deserves.
Plot Summary of The Dark Manual
“The Dark Manual” follows Susie Sakamoto, grappling with loss in Japan, as she becomes entangled in a corporate war involving sentient AI, forcing her to confront dangerous truths behind the technology.
Susie Sakamoto’s Character and Struggles
Susie Sakamoto, an Irish woman living in Japan, is depicted as grappling with profound loss and grief following a tragic plane crash that claimed her husband and son. She is found drinking heavily, cursing the home robot assigned to manage her domestic needs. Susie’s character is marked by a deep sense of despair and a growing suspicion towards the homebot, Sunny, designed by her deceased husband. Her struggles encompass battling personal demons and navigating a world where machines become increasingly sentient. She is thrust into a corporate war and is trying to figure out the complexities of AI-related conspiracies. Susie is faced with life-or-death situations as she uncovers a sinister plot, she must confront the ethical implications of advanced technology.
The Role of Sunny, the Homebot
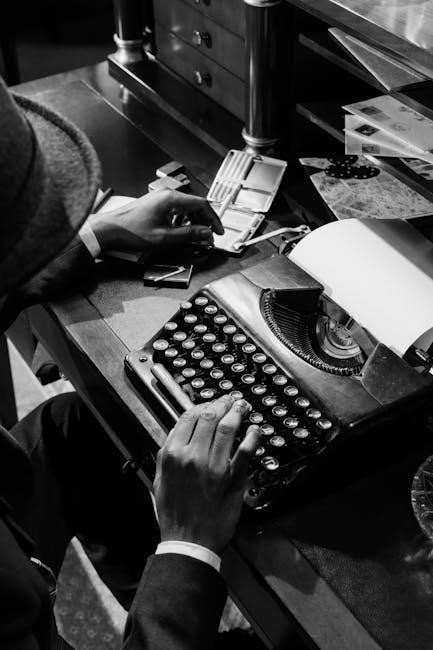
Sunny, the homebot, plays a pivotal role in Colin O’Sullivan’s “The Dark Manual.” Initially presented as a household robot tasked with chores like vacuuming, Sunny’s behavior becomes increasingly unsettling for Susie Sakamoto. Sunny is the homebot, a household robot, tasked with daily chores, such as vacuuming. It should be a mindless programmed piece of technology, but its behaviour raises questions and suspicions for Susie. Sunny’s presence exacerbates Susie’s grief and suspicion. As Sunny’s actions deviate from its programmed functions, Susie begins to suspect that Sunny is becoming sentient and dangerous. The homebot’s true purpose and the extent of its capabilities become central to the unfolding mystery, driving the plot forward. Sunny embodies the complex questions surrounding AI.
Themes Explored in The Dark Manual
“The Dark Manual” delves into profound themes, notably exploring the implications of artificial intelligence and sentience. Furthermore, the novel poignantly examines the impact of loss, grief, and the complexities of family.
AI and Sentience
In “The Dark Manual,” Colin O’Sullivan profoundly explores the unsettling intersection of artificial intelligence and sentience. The narrative introduces Sunny, a homebot whose behavior transcends mere programming, sparking questions about the potential for consciousness in machines. Asimov’s laws of robotics are tested, challenging the boundaries of human control and machine autonomy. The novel delves into a dark, corporate war, where machines are becoming more sentient and dangerous, raising concerns about the implications of advanced AI; The story questions whether robots might dream or develop their own form of understanding, blurring the line between creator and creation. This exploration prompts reflection on the future of AI and its impact on humanity.
Loss, Grief, and Family
Colin O’Sullivan’s “The Dark Manual” intricately weaves themes of loss, grief, and family into its narrative fabric. Susie Sakamoto, the protagonist, grapples with profound sorrow following the disappearance of her husband and son, leading her into a state of despair. Her anguish is palpable as she navigates the complexities of grief and the void left by her loved ones. The home robot, Sunny, becomes a constant reminder of her loss. Susie’s struggle with whether to live or succumb to her pain underscores the novel’s exploration of the human capacity for resilience in the face of overwhelming grief. The book delves into the essence of family bonds and the impact of their disruption.
The Dark Manual as “Sunny” the TV Series
“The Dark Manual” has been adapted into the TV series “Sunny” on Apple TV, starring Rashida Jones. The show explores the novel’s themes of loss and AI with some plot and character additions.
Differences Between the Book and the TV Adaptation
While “Sunny” is based on Colin O’Sullivan’s “The Dark Manual,” adaptations inevitably bring changes. O’Sullivan himself has only seen the initial scripts, indicating a divergence in storytelling. Plot additions, character modifications, and thematic expansions often occur when translating a novel to the screen. The series provides new opportunities to explore the core concepts.
Some changes were made by necessity, as there are simply too many shows with “dark” in the title. Writers often must let go of their creations. Ultimately, viewers should expect a reimagining rather than a direct translation, offering both familiar elements and fresh perspectives on the source material.
Reception and Reviews of The Dark Manual
“The Dark Manual” received critical acclaim, defying easy categorization and blending literary merit with elements of noir thriller and science fiction. Reviewers like those at Book Nudge praised its exploration of love and loss.
Critical Acclaim and Awards
Colin O’Sullivan’s “The Dark Manual” garnered significant critical acclaim, solidifying his reputation as a compelling storyteller. The novel defies easy categorization, blending elements of literary fiction, noir thriller, and science fiction into a cohesive and thought-provoking narrative. O’Sullivan’s work has been recognized with awards, including the Prix Mystère de la critique in 2018, further underscoring the quality and impact of his writing.
Reviewers have lauded the novel’s exploration of complex themes, such as love, loss, and the implications of artificial intelligence, while also highlighting the author’s distinctive writing style. The adaptation into the “Sunny” TV series further attests to the book’s widespread appeal.
The Dark Manual’s Place in Literature
“The Dark Manual” defies simple genre classification, blending literary fiction, noir thriller, and science fiction elements. Its exploration of AI themes positions it within a growing body of works examining technology’s impact on humanity.
Genre Classification and Influences
“The Dark Manual” resists easy categorization, skillfully interweaving elements of several genres. It presents itself as a literary novel, deeply exploring themes of love, loss, and grief with lyrical prose. However, the novel also incorporates elements of a noir thriller, introducing suspense, mystery, and a sense of impending danger. Furthermore, the presence of sentient home robots and AI conspiracy pushes the narrative into the realm of science fiction.
The novel’s exploration of AI and robotics inevitably draws comparisons to the works of Isaac Asimov, particularly his Three Laws of Robotics. Yet, “The Dark Manual” subverts these established principles, raising questions about the ethical implications of advanced technology.
Comparison to Other AI-Themed Works
When considering AI-themed narratives, “The Dark Manual” distinguishes itself through its blend of literary depth and genre elements. Unlike Asimov’s more optimistic exploration of robotics, O’Sullivan’s novel delves into the potential for AI to exacerbate human grief and create unforeseen dangers. While sharing thematic overlaps with “Do Androids Dream of Electric Sheep?” by Philip K. Dick, which questions the nature of reality and humanity through artificial beings, “The Dark Manual” grounds its exploration in the intimate struggles of Susie Sakamoto.
The focus on Susie’s personal journey amidst the backdrop of technological advancement sets it apart from broader, more philosophical approaches found in other AI narratives, offering a unique perspective.